
New course · Now streaming
A Photographer’s Guide to the Grand Canyon
Thirteen lessons on location, both rims, with award-winning landscape photographer Ramtin Kazemi.
Scout at noon. Shoot at sunset. One lens. Bring a jacket. Protect the highlights. Embrace the haze. Simplify the scene. Look for the shadows.
The Grand Canyon won’t fit in one frame. Ramtin shows you which frame to make.
$199/year · 30-day money-back guarantee 4.8 “Excellent” · 1,843 reviews on Trustpilot
About the course
wo rims, one canyon that runs east to west — so the light works at sunrise and sunset. In A Photographer’s Guide to the Grand Canyon, landscape photographer Ramtin Kazemi takes you to the overlooks worth your time: Cape Royal, Angel’s Window, and Point Imperial on the quiet, dark-sky North Rim; Pima, Hopi, and Shoshone Points on the South. Filmed on location as the weather turned, it covers where to park, when to arrive, what to carry, and how to compose and expose when fog fills the canyon or the sun drops behind the rim — plus panoramas that stitch cleanly and sharp frames from a helicopter. One sunset or a full loop from Vegas, you’ll know exactly where to stand.
Why this course matters
Anyone can come home from the Grand Canyon with a snapshot.
A photograph takes judgment: knowing that midday is for scouting and the real work starts ninety minutes before sunset, that the haze everyone complains about is what gives a frame its depth, that the best composition usually arrives when most of the scene is in shadow and everyone else has packed up. Ramtin teaches that judgment on location, in real conditions — fog, closed trails, a rainbow that lasted minutes — so you watch the decisions get made, not just the results. Those habits travel. They’ll make you better at any overlook, in any park, long after you’ve left the rim.
What you’ll learn
The canyon, in five rules
In the order Ramtin works every overlook.
Pick your rim before you pick your lens
South Rim for lodging and the shuttle, North Rim for quiet and the Milky Way. Either way: one 24–200mm, a light pack, water, a travel tripod, and a jacket — even in summer.
Scout at noon, shoot at the edges of the day
The canyon runs east to west, so sunrise and sunset both deliver. Use the harsh hours to walk the trail, test frames with a telephoto, and pick your spot.
Protect the highlights
Underexpose a stop or two and read the histogram. Shadows recover; blown highlights don’t. And the haze everyone complains about is depth, not a problem.
Simplify the scene
Zoom in to drop a flat sky, frame with a tree, find a foreground, and test the composition on your phone before the tripod comes out.
Wait for the shadows
The best frames arrive when most of the scene is in shadow, not when the sky is brightest. Ninety minutes before sunset is when flat rock turns into layers.
Across all 13 lessons, from the packing list to the last light at Shoshone Point.
Watch Lesson 9. Free. No signup.
No credit card either. Pima Point: Find the Foreground is streaming in full right here. Press play and see exactly how Ramtin teaches before you spend a dime.
That’s one full lesson, free. The other twelve are ready when you are.
What’s inside
Sixteen stops. Thirteen lessons.
The North Rim first, then the South. Swipe the route and tap a stop to open its lesson — or tap any lesson below.
The thirteen lessons
Tap any lesson to see what’s covered.
Developed South Rim or quiet, dark-sky North Rim? Ramtin covers both, plus the Vegas loop, what to pack (a jacket, even in summer), the one lens that does it all, and why the canyon’s east–west run gives you good light at both ends of the day.
Fog is drama, not a ruined morning. Frame rock formations as they emerge, lean on negative space, and underexpose a stop or two to keep the mood.
A paved drive to one of the North Rim’s quietest viewpoints, no 4x4 required — and why the shoulder seasons leave it nearly empty.
The trail forks to Cape Royal Point and Angel’s Window, and both work at sunrise and sunset. Walk it in harsh light, test frames with a telephoto, come back when the light is worth it — and stay late for the Milky Way.
Level tripod, vertical frames at 24–50mm, 50% overlap, manual exposure set for the brightest frame, focus and white balance locked. Every step, demonstrated at Angel’s Window.
Ramtin’s pick for the best lookout on the North Rim, and the place to make peace with haze — it’s what gives the layers depth. Cell service dies here, so download your maps first.
Point Imperial as a weather system moves through. Ramtin’s settings — about 70mm, f/8–f/11, slightly underexposed — then midday and late-afternoon frames side by side to show how shadow turns flat rock into layers.
Too much canyon is a real problem. Zoom in to drop a flat sky, read the histogram so the highlights survive, and see why 24mm beats 28mm. Then a rainbow appears, patience pays, and a V-shaped shadow makes the shot.
What every wide shot needs. Frame with trees, test compositions on your phone before the tripod comes out, block sun glare with a finger, and watch 16mm and 200mm turn one overlook into two different photographs.
Drones are banned, so Ramtin booked a chopper — and lost his first frames to motion blur. The fix: shutter priority at 1/2000 or faster, auto ISO, –0.5 to –1 exposure compensation, and a polarizer for window glare. Practice on the ground first.
Sunset on the Rim Trail, where the old trees do the composing. Ramtin wedges the tripod into a branch, focuses ten inches from a 14mm lens, and explains the trade-off: wider makes the frame more beautiful and the canyon smaller.
Shoshone Point is a short, flat walk from the car and a quiet alternative to crowded Mather Point. Ramtin’s tip here changes how you see sunset: stop waiting for a bright sky and start looking for frames where most of the scene is in shadow.
The best frames from both rims — the Point Imperial rainbow, the Hopi “money shot” — and the decision behind each. Then the honorable mentions: Lipan, Moran, and Yaki Points, plus Toroweap and Mooney Falls for those willing to earn them. And a reminder: no photograph is finished until it’s processed.
All 13 lessons are streaming right now. Join KelbyOne for just 54¢ a day →
Who’s teaching you
Learn from a photographer who knows both rims, overlook by overlook
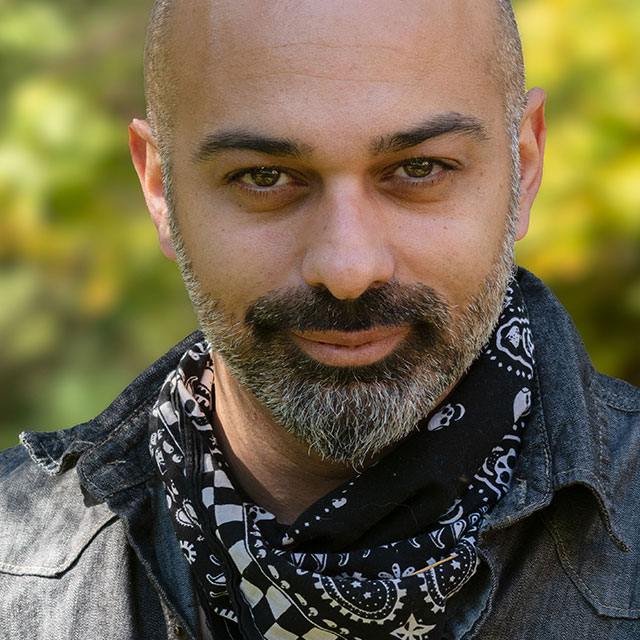
Your instructor
Ramtin Kazemi is an award-winning landscape photographer based in Canada who calls himself a creature of the light — out before sunrise, still shooting after sunset, and drawn to places most people never see. He leads adventure photo tours and workshops around the world, has shown his work in a solo exhibit at The Gallery at KelbyOne, and teaches with no secrets held back. Here, he hands you both rims of the Grand Canyon.
From the course
See the canyon through Ramtin’s lens
Four frames from both rims — the overlooks Ramtin walks you through, stop by stop. Tap any frame to see it full size.
Loved by members
You’re in good company
Rated 4.8 out of 5 — “Excellent” — across 1,843 reviews on Trustpilot.
More than one course
This course is just the beginning
A Photographer’s Guide to the Grand Canyon comes with your KelbyOne membership — and so does everything below. Tap any benefit to see what’s included.
The full KelbyOne library covers photography, Lightroom, and Photoshop from first principles to professional technique — portraits, landscape, travel, studio and flash, wedding, sports, street, food, fashion, business, and more. Every course is taught by a working pro, broken into focused lessons you can watch in any order, and available to stream whenever you want. Start a class on your lunch break, finish it that night, and come back to it any time you need a refresher.
KelbyOne releases a new course every single week, so your membership is worth more the longer you hold it. New techniques, new gear, new software releases, and new instructors are added continuously — meaning the latest in photography and post-processing is always waiting for you, and you'll never pay extra for it.
Not sure what to watch next? Curated learning tracks sequence the right courses in the right order so you build skills step by step instead of jumping around. The Photographer's Fast Track is designed to save you years of trial and error, and your progress is tracked along the way so you always know what you've finished and what's next.
Your membership includes a growing toolkit of free Lightroom presets, Photoshop brushes, and other downloadable resources you can put to work right away. Many courses also include downloadable practice files so you can follow along with the exact images the instructor is using — learning by doing, not just watching.
Stream on your computer, phone, tablet, or Apple TV and pick up right where you left off on any device. The KelbyOne app also lets you download classes for offline viewing, so you can keep learning on a plane, a road trip, or anywhere without a connection. Your account works anytime, anywhere.
Learning is easier with people in your corner. KelbyOne members are a welcoming, genuinely helpful community — the kind who go out of their way to answer questions and help you progress. When a technique doesn't click, there's a place to ask, and real photographers at every level who are happy to help.
If you're unhappy for any reason, contact us within the first 30 days of an annual membership (or the first 7 days of a monthly membership) and we'll gladly cancel and issue a full refund. You also get access the moment you join, and you can cancel anytime from your account page. There's nothing to lose by trying it.
Not a member yet?
Unlock the entire library.
$249$199/year
About 54¢ a day · billed once a year · $40 less than paying monthly
Get this course plus 1,000+ more with an annual KelbyOne membership, with a new course every week. Still deciding? Watch the free lesson first and see for yourself.
Join NowInstant access to every course, on every device
★★★★★ Rated 4.8 “Excellent” on Trustpilot · 30-day money-back guarantee
Everything included
- This course — A Photographer’s Guide to the Grand Canyon, all 13 lessons
- Full access to all 1,000+ courses
- A new course every week, at no extra cost
- Guided learning tracks & the Photographer's Fast Track
- Free presets, brushes & downloadable practice files
- Watch on desktop, mobile, tablet & Apple TV — even offline
- Friendly, helpful member community
Still on the fence?
Start monthly at $19.99/mo and switch to annual anytime. Heads up: paying month-to-month works out to $239.88 a year — $40 more than going annual.
Backed by a 100% Money-Back Guarantee
Not happy for any reason? Contact us within the first 30 days of an annual membership (or the first 7 days of a monthly membership) and we'll gladly cancel and issue a full refund. You get access the moment you join.
Questions? Answered.
Everything you need to know
Right away. The moment you join, you can sign in and start watching A Photographer’s Guide to the Grand Canyon — and every other course in the library — immediately, on any device.
Absolutely. KelbyOne has courses for every skill level, taught in plain language, step by step. This course meets you where you are, and the rest of the library grows with you as you improve.
No. Ramtin shoots this course with a mirrorless camera and one versatile 24–200mm zoom, and every technique works with whatever you own. Lesson 1 covers the practical gear you’ll actually want: a light backpack, water, a travel tripod, one do-it-all lens — and a jacket, even in summer.
Annual is the best value by a wide margin: $199 for a full year (regularly $249) works out to about 54¢ a day and saves you $40 compared to paying month-to-month ($239.88/year). Monthly is there if you'd rather start small — and you can switch to annual anytime.
Yes. Cancel whenever you like from your account page and you'll keep access until your membership period ends. You're also covered by our money-back guarantee — 30 days on annual, 7 days on monthly — so there's no risk in trying it.
Yes. Stream on desktop, mobile, tablet, and Apple TV, and pick up right where you left off on any device. The KelbyOne app also lets you download classes to watch offline — on a plane, a road trip, anywhere.
Of course — KelbyOne has members all over the world. All prices are listed in US dollars (USD), so just keep your local exchange rate in mind at checkout and renewal.
Yes. Watch the trailer at the top of this page, then scroll down to Lesson 9, Pima Point: Find the Foreground, which is free to watch in full. No signup or credit card needed. If you like how Ramtin teaches, the rest of the course is one membership away.
The Grand Canyon is waiting.
Ramtin’s already scouted it.
Join KelbyOne today and stream A Photographer’s Guide to the Grand Canyon — plus 1,000+ more courses from the world’s best instructors — with a single membership.
Join KelbyOne & Start Watching$249 $199/year · about 54¢ a day · Money-back guarantee